What Tracing Can Do For YOU
Pulling Images - Planning Your Own Composition
Today we will learn to trace and pull images from illustrations and other art images. You will recompose these images into your own chosen format to create a unique composition by placing the images in a different visual context(translation: You will have fun and like your finished drawing!). Just doing this will lead to better drawing in your own freehand drawing -- now or in the future.
Try it -- it is a favorite of my students and their contour drawing advances after having worked this exercise three or four times. My students who work with children in pre-school have used variations of this exercise with ages four and up.

Tracing Paper and Bristol "Board"

You will enjoy using a higher quality paper to transfer you images onto for your finished design. Here I am using bristol paper or as it is often called: bristol board. The paper finish on this specific paper is called vellum, the finish of which is slightly textured. In other words it has some tooth. Bristol board also comes with a smooth surface or no tooth that is simply called: smooth. Again, I am using the vellum bristol board paper.
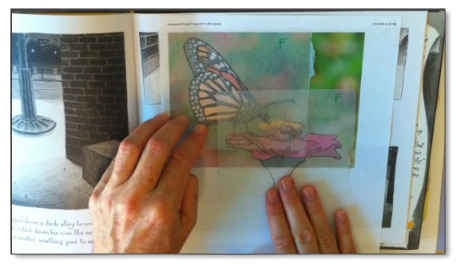
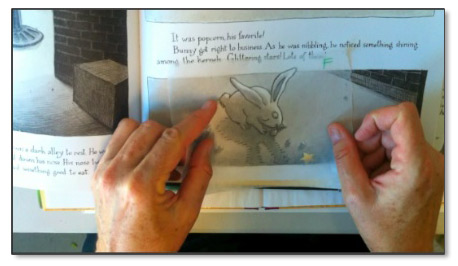
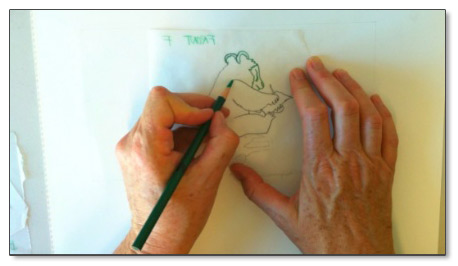
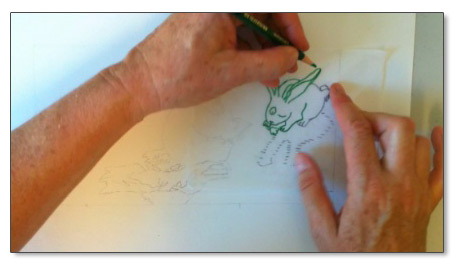
Pulling Images from Children's Books or Other Sources

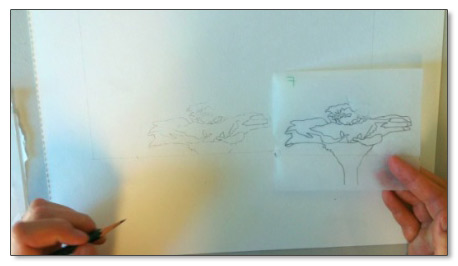
The softer drawing pencils are excellent for this purpose. Be sure to use a soft graphite when it will be moved with the pressure from one paper downward to the other. You do need softer graphite for this. You can use a 2B, 3B, 4B, 5B or 6B for this. I'm using a 5B pencil.
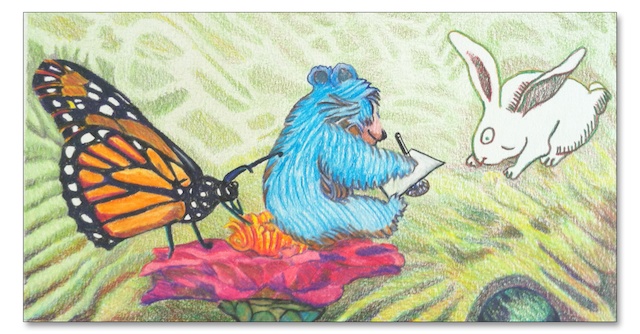
Illustration sources: Big Brown Bear Goes to Town - written and illustrated by David McPhail and The Magic Rabbit written and illustrated by Anette Le Blanc Cate. Permission to use as examples for this DrawingFree Ezine requested and pending.
Tracing Once, Sometimes Twice

Tracing gives you a lot of practice using your eyes and hands together, as well as a stronger skill set for drawing from real life. Tracing is GOOD FOR YOU (and FUN)!
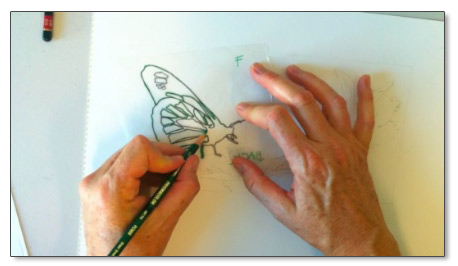
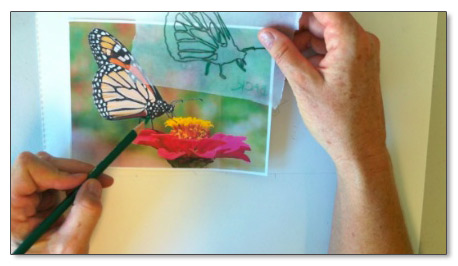
Play with Your Images

Finalize the Positions
Now you will finalize your decisions on the placement of your images. Once you finish this you will be able to choose where you want the format (drawn outer edge of the composition) to be around the edges of your images. The edge of the format should come close enough to your images so that they don't just float in the middle of the space. You can even have some of your images partially going outside of or cut off by the edge of the format. You may determine at this time that you need more images -- possibly background images (often smaller in size and more muted) -- or some other images to complete your composition.
Time to Start Your Composition

Putting Your Images to Paper

Working within a format will help you to become sensitive to the very important relationship between your inner design (what you paint) and the outer edge of your work (the format). All viewing includes the total design which includes the edge or the "outer limits" of your drawing or painting as well as what is painted on or inside the edges. This is the overall picture!
This helps you keep track of where you have been and where you still need to draw/transfer.
Time for Colored Pencils!
Beginning to Draw with Color
Put your lightest colors down first. You have to think this through a little bit. But this is just your first drawing -- not your last -- you must allow yourself always to be learning. Be easy with yourself and enjoy what you see happening -- no matter what.
Draw your background in early -- it could be the first space that you draw. Remember that to keep the background BACK the color needs to be more muted especially in the top third of your composition. It is easier to put the background in first -- even if you don't know what to do -- at least start now by drawing a smooth layer of one light color.
START NOW! Get your drawing READY for color. My students love doing this process and will not even leave their seats when they are making their compositions and drawing color into their images and backgrounds. PERSONAL BONUS: This process can be SO relaxing.
The NEXT DrawingFree Ezine will show you still shots of this drawing as it goes to the point of completion.
Here is a preview of the completed piece:
For more information on Margaret Welty go to: www.margaretwelty.com -- but first SIGN-UP HERE FOR THE DRAWINGFREE EZINE.
Copies of each issue for DrawingFree Ezine can be found on the DrawingFree Web-site:
www.drawingfree.com
Copyright 2010 Margaret Welty. All Rights Reserved. Permission is granted to link to this site, information or to quote WITH author notation: "From the Drawing Free Ezine Created by Margaret Welty at www.drawingfree.com".

Presented by Margaret Welty and the Drawing Dog
Each lesson presented in the Drawing Free Ezine gives you ways to massage your own neurological white matter to further form and train your ever transitioning ART BRAIN. Remember that the key is to DRAW, play and be easy with yourself. Eliminate any unrealistic expectations and judgements about your work. Work to be happy while you draw! Draw like a child with no expectations beyond your current beginner's brain, eyes, hands and heart. Orient your focus toward the fascination that consumes a small child upon discovering that she can make her own marks appear. Make your own marks appear!!
Create a chance to draw. Draw every chance you get.
Make a space to draw. Draw in every space you make.